I would like to present some instructions for installing Tactical Innovations STBA (Stainless Trigger Bushing Assembly). Although the procedure is very simple, (Tac Inc did not provide any instructions but they claim that they only take 5 to 10 minutes to install) I want share how I went about doing it. Several assumptions to be made here: You are working with finished AR15 lower receiver which already has the hammer/trigger pin holes drilled in the proper locations, you have the proper tools to carry out the work, and a bit of time and patience to do it right.

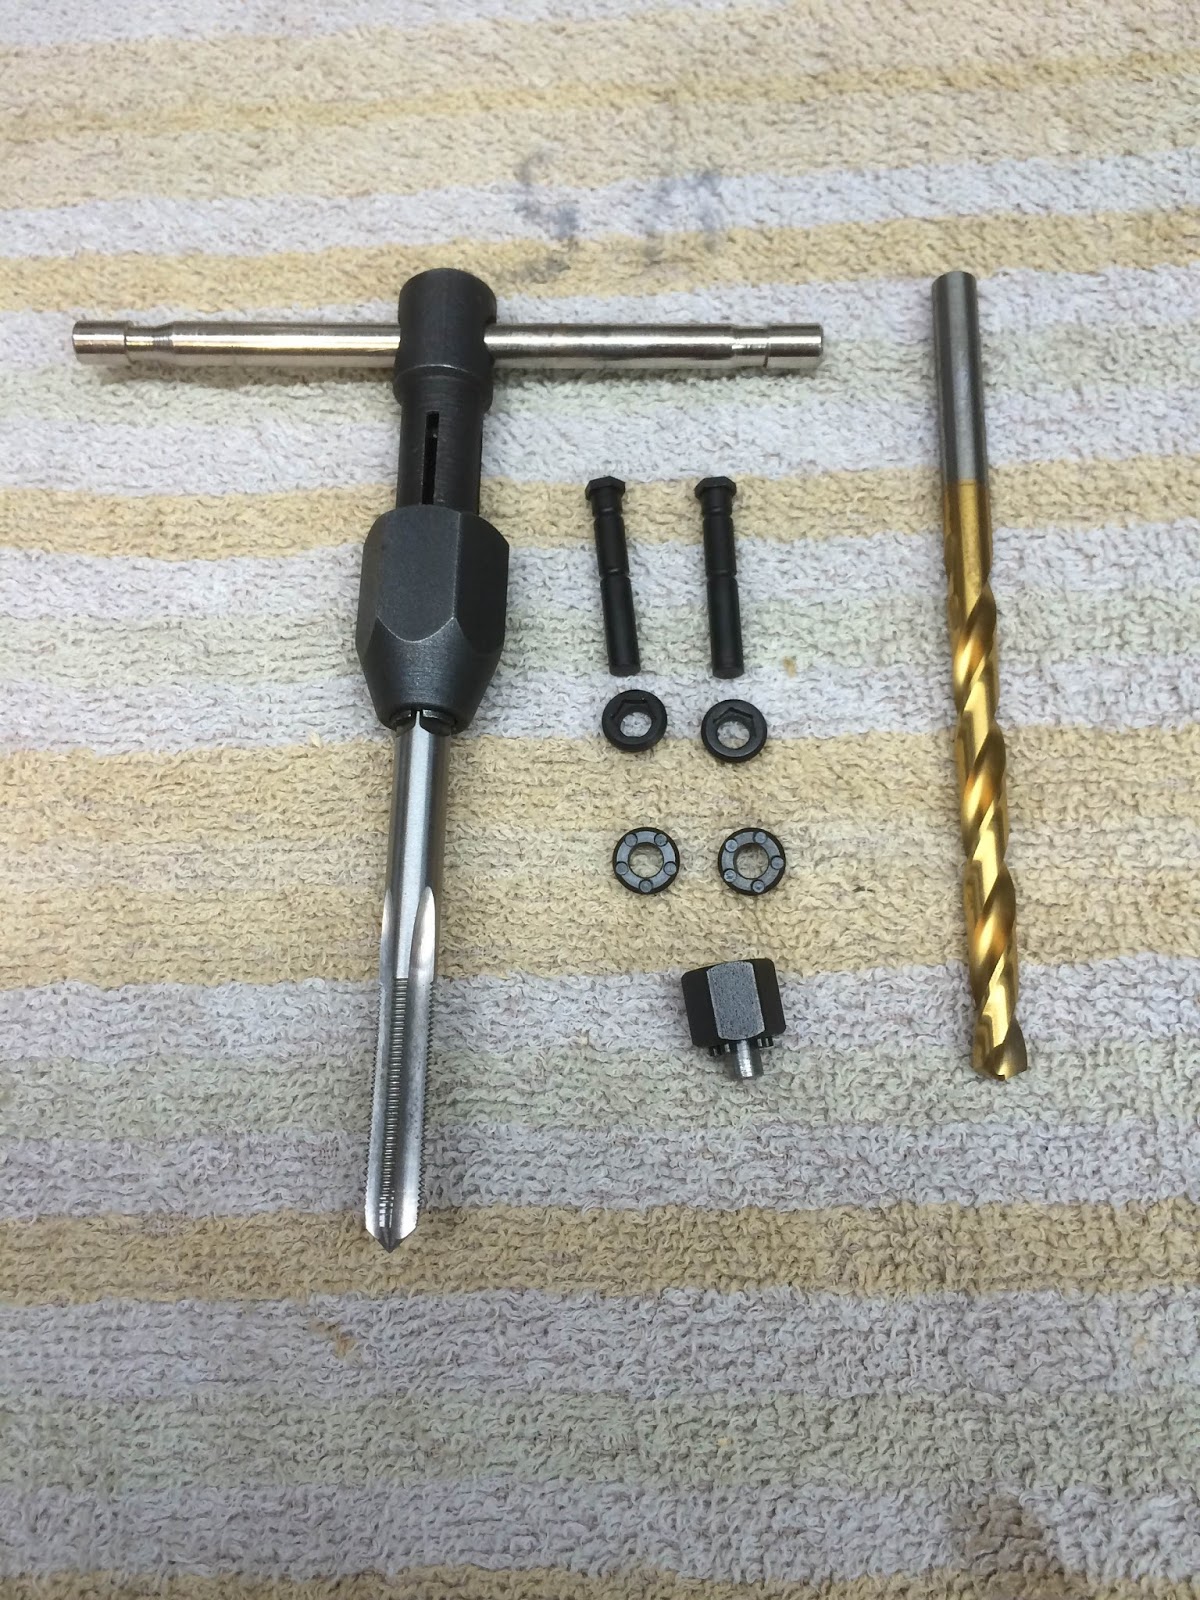
A few things: I do not recommend simply taking a hand drill and doing this free hand. Although they might turn out fine with this this method, there is a possibility of moving your trigger or hammer pin holes slightly because drill bits can "walk"- not just when drilling a new hole but also when enlarging an existing hole. It took me about a half an hour to complete the installation using the method described below. I'm assuming the 5 to 10 minute time specified by Tac Inc is for the hand drill method. I'll say again- although you can use the hand drill method- I recommend that you clamp down lower receiver and do the drilling in a suitable drill press. Material/tool list: 1/4"-40 tap and tap wrench (McMaster Carr #2595A144), #1 drill bit (McMaster Carr #2901A172) [do not substitute for the closest fractional size!], STBA Bushing Installation Tool (for right side bushings), 3/16" allen wrench (for left side bushings), 3/8" socket and driver, thread locker of your choice, drill press, some cutting oil, and lastly a system to hold your lower receiver down squarely.
I used half of my 80% jig to hold the lower receiver flat and square. I put a 3/8" bolt all the way through the jig, selector hole, and drill press table to hold everything in place. A feeler gauge was used as a shim to keep the lower from tipping in the jig. You'll have to use your imagination if you don't have a jig to hold it down. You could take a small steel plate about the size of the flat area of the fire control pocket wall and drill a hole in it. Relief cuts for the selector lever stops would have to be made as well.
Step One: Locate existing holes. I chucked up a 5/32" bit and sunk it into the existing trigger pin hole to locate the chuck exactly in the right spot. Lower the bit (with drill press off!) and move the receiver until there is no resistance on the sides of the bit. Tightened the 3/8" bolt and rechecked it.
Stroke the drill press up and down to make sure the bit is not touching the sides of the hole. If so, readjust and check again.
Stroke the drill press up and down to make sure the bit is not touching the sides of the hole. If so, readjust and check again.

Step Two: Chuck up your #1 drill bit and drill away. A bit of cutting fluid never hurts. Repeat steps one and two for the other three holes.

Ready for tapping. I must say it was a bit unsettling to see those big gaping holes in the side of the receiver.

Step Three: Tap each hole. I did it free hand and eyeballed it for squareness. A bit of oil or cutting fluid in this step will help things along. Option: A light chamfer could be cut on each hole before tapping to help the tap start. I did not find this necessary since aluminum is so soft and I was using a new, "through hole" tap with plenty of tapered starting threads. The tap started easily and it was not difficult keep it square.

Step Four: (not pictured) Thoroughly de-grease the tapped holes. I used automotive brake and parts cleaner and compressed air. Also de-grease the threads of the bushings.
Step Five: Install the right side bushings. These have little dimples in their face and require the use of Tac Inc's special tool and a 3/8" socket. I used blue Loctite #242 (medium strength, removable without heat)

Step Six: Install the left side bushings. 3/16" hex driver fits right into the bushing.

You're done! Insert the pins- they will have a nice snug fit. These are very precisely made and the bushing to pin clearance is nil.

View of right side.

View of left side.

Right on brother...Yeah found out the hard way a hand drill isn't an acceptable method of machining AR parts, thus the bushing set. Really wish the 80 percent companies would stop promoting their goods by claiming that, no matter what kind of jig you are using there's just no way to get a good centered drill hole at a right angle. You can get lucky sure, but nothing that's consistent. Plus all but the best of hand drills have chuck runoff which wobbles the drill bit slightly as you are drilling. You'd probably spend more money on a hand drill that didn't do that than you would an inexpensive tabletop drill press. Thanks for the instructional, really gonna help me clean up this mess of a lower . Luckily the select fire hole went well.
ReplyDeleteSo youre an ffl holder who only owns a hand drill? Or youre a felon? Which one?
Delete