After buying a stripped barrel for an AR15 build I'm working on, I had to decide which type of front sight base/gas block I would choose to use. I chose the standard A2 for it's durability and traditional look. To install one properly, special tools and know-how are required. I was not about to pay a gunsmith (probably at least a 100$ job) for something that I could probably do at home. So I did bit of research. They do make jigs for the purpose of aligning the front sight base to the to the barrel extension index pin but it was up around a couple of hundred dollars to purchase. I could not justify that cost- anticipating that I would probably only do one or two these installs in my life. Knowing that many low-pro gas blocks use set screws to hold them in place, I figured I could do the same with an A2. My only initial concern was that low-pro gas blocks are generally protected from exterior forces since many times they are hiding under a free float hand guard and only have to endure heat and vibration factors. The A2 is a bit different since it kind of hangs out there and it susceptible to the accidental bumps and bruises of normal use. I am fully aware that drilling and pinning the FSB is the best way to install it. No arguments here. But I was looking for a simple acceptable way to install the base without hiring it done or getting into precise machining myself, of which I do not have the tooling to accomplish. Here is how I went about doing it: (follow text above each caption)
A note before I start: This procedure will work with a new FSB and one that has previously been drilled and pinned to a barrel. New FSB's run around $35. You can find used bases with taper-pin holes in them for as low as $10 to $15. When I was searching the net for information on how others have converted their A2 FSB to set screw mounting, none of them drilled and tapped through the bayonet lug area, which is in my opinion is the most essential one since it uses the longest set screw (more holding power), it is positioned perpendicular to the barrel (as opposed to the less than desirable positioning of the drilled and tapped taper pin holes), and it uses a pointed set screw which is secured to a cone shaped dimple in the barrel. They did use the hole between the sling swivel ears, but this area is very thin and only an 1/8" long set screw can be installed. I do not believe that only drilling and tapping the 4 taper pin holes will provide sufficient stability and strength to the FSB. In my procedure this is done IN ADDITION to the set screws going through the bayo lug and sling mounting area. It is also difficult to keep the FSB from canting when tightening the screws if you only drill and tap the taper pin holes. Also note- I chose 10/32 set screws for several reasons.
It is the largest set screw that can be used on the bayonet lug area without poking through the narrow portion of the lug. Also, the existing hole between the sling swivel ears is already drilled to nearly the correct diameter and only slight enlarging is required. If I remember correctly, there space between the sling swivel ears will not allow for a larger screw. Moving on......
Tool/Material List: #21 drill bit, 10-32 High Speed Steel tap and tap wrench, 5/32" end mill, vise blocks (I used these small pieces of oak), cutting oil, emery cloth, vise, hand drill, drill press, Loctite of your choice (see last steps). 10-32 by 1/8" knurled cup point set screws (local hardware store or McMaster-Carr part number 90289A335, $7.43 for 25) 10-32 by 3/8" cone point set screw (I don't know if your local hardware store will have these, McMaster Carr part number 92695A213, $8.78 for 50) When I ordered my set screws, I went ahead and ordered a few new 10-32 taps and #21 drill bits. I like working with sharp cutting tools and I figured I'd make my order worthwhile since I was paying for shipping anyway. McMaster Carr part number for High Speed Steel 10-32 through-hole tap: 2522A779 ($4.96 ea.) For short length #21 High Speed Steel TiN coated drill bit: 3584A161 ($3.82 ea.)

Step 1: Mark the bayonet area of the FSB with an appropriate tool, preferably with a metal scribe and give it a good center punch. Make sure you center it as good as you can. I used dial calipers to get "close enough"by splitting the width. For the other hole-the area between the sling mounting ears already has a pilot hole (when the gas port was drilled at the factory.)

Step 2: Clamp the FSB in a suitable fixture. You can use anything that holds it firm. It is quite a difficult bugger to get a straight hold on, since it is tapered from top to bottom. I used two thin slices of oak on each side of it to help keep it straight in the vise and to prevent marring.

Step 3: Grab a #21 drill bit. Then, drill the hole in the bayonet lug area and then enlarge the hole between the sling ears. This is the correct tap drill size for a 10-32 set screw. I would not recommend using the nearest fractional drill. Get the #21 bit. The material seems fairly soft and should drill easily.

Step 4: Tap the hole between the sling ears with your 10-32 tap. Don't tap the bayonet lug hole yet! I'll tell you why in a minute.

Step 5: Slide on the barrel nut, hand guard cap, and FSB, and get your 1/8" long 10-32 cup-point knurled screw ready. Thread it in but don't snug it yet.

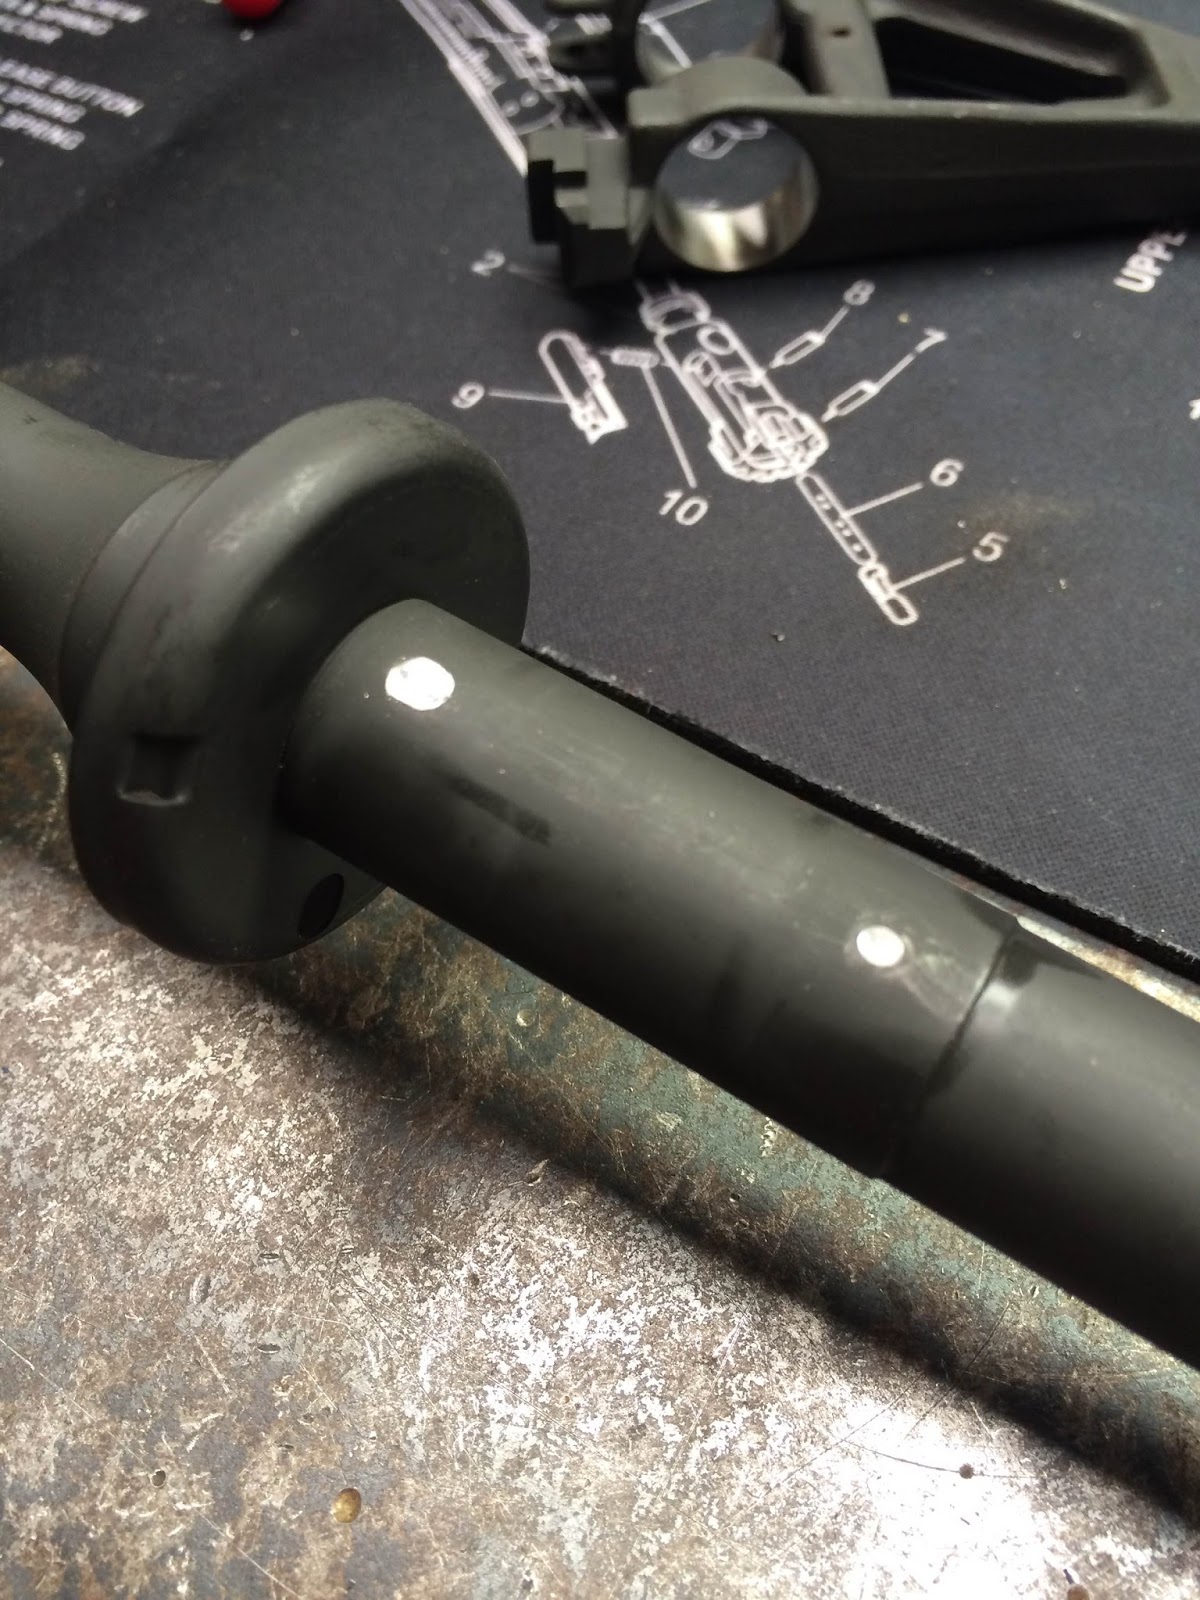
Step 6: Now is the most important part of the alignment process. To avoid buying an expensive jig to line up the FSB and keep it perfectly straight, install your barrel on the upper receiver and snug the barrel nut firmly. I used a carry handle receiver for this build but it should work the same for a flat top as long as you use a spacer that sits under the picatinny rail, as the back of the receiver is rounded and will not sit flat on your bench (see 2nd picture below). A note if you are using a carry handle receiver: make sure the rear sight is not installed. You want the receiver resting on the rear corner of the carry handle, not on the rear sight housing! Set the barrel/receiver assembly on a flat surface and apply a bit of down pressure approximately in the center of the hand guard area of the barrel. If you push too hard you will rock the assembly to one side and botch your alignment. At the same time, apply lateral pressure to the FSB against the hand guard cap. When you think you got it square, snug your set screw. Now pick up and with your best eye, in good lighting, sight down the top of the receiver to the FSB. Everything should be straight and square. The human eye can detect as little as several thousands of inch of mis-alignment, so take your time and get it straight. Now tighten your set screw. Re-check your alignment and now you are ready to prepare the bayonet lug set screw location.
If you are concerned about keeping the FSB tight against the handguard cap, go to step 5 in my other tutorial for instructions. LINK


Step 7: Now go back to the drill press, and with your #21 drill make a dimple in the barrel using previously drilled bayonet lug hole as a guide. This is why we did not tap this hole previously, to avoid damaging the threads with the drill bit when making the dimple. It makes a nice cone shaped seat in the barrel for your pointed set screw to mate into.

Step 8: Loosen the short set screw, remove the FSB and tap the bayonet lug hole with the 10-32 tap.

This is what it should now look like.

Step 9: Now install the FSB back on to the barrel (with hand guard cap going on first!) and set the barrel/receiver on it's back just like you did in the alignment process. Don't forget to apply some lateral pressure to force the hand guard cap against the barrel shoulder, too. Install the 3/8" long 10-32 cone point set screw into the bayonet lug and snug it. Pick up the assembly and check your alignment. Snug your long set screw a little tighter and check alignment again.

Step 10: Grab your 5/32" end mill and carefully, without touching the sides of the threaded hole, mill out a flat spot on the barrel in the hole between the sling ears. You can use a hand drill if you hold it square or go back to the drill press.

This provides a nice flat area on the barrel for the cup point of the set screw to seat into.

Finished product.
For used FSB'S Go to Step 11. If your FSB was new, go to step 13.
Step 11: If your FSB was previously drilled and pinned to another barrel, now is the time to drill and tap the 4 taper pin holes. I say 4 because you will be drilling and tapping 2 holes on each side individually. Lay it on it's side but you'll have to shim it up a bit to make it lay flat. Drill half way through only- do not attempt to drill all they way through. Use your #21 drill bit.

Step 12: Get your 10-32 tap and tap each individual hole. De-burr the inside and your done, move to step 13.


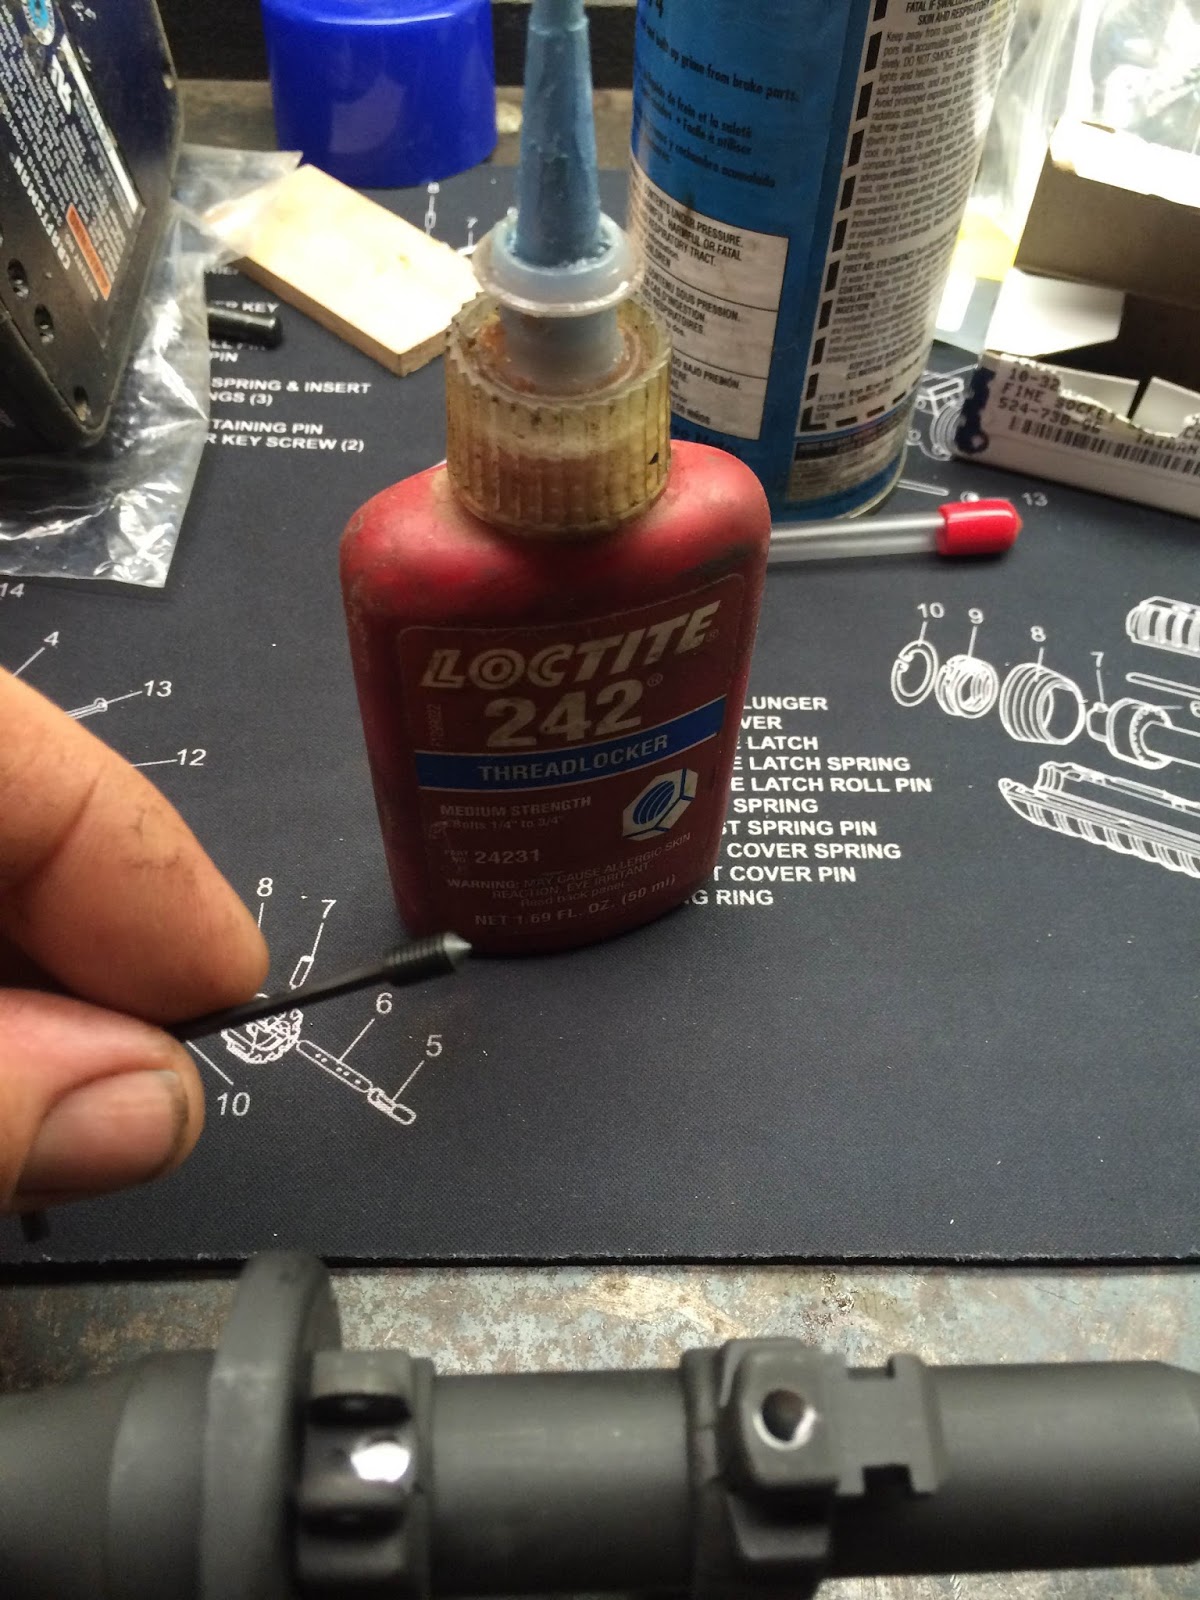
Step 13: Remove set screws, take off the FSB and clean all chips and drill shavings from it preferably with compressed air. Check that gas port and gas tube hole so there is no debris in there. Now degrease the FSB with a suitable solvent. I use automotive brake and parts cleaner. Pay special attention to the threads you just cut because these need to be totally free of oil residue for the Loctite to hold properly. At this point, degrease your set screws, too- as many of them have a slight oil film on them applied by the manufacturer. Slide the FSB back onto the barrel (hand guard cap first!) and set the barrel/receiver assembly on its back as you have twice before. While applying down pressure to middle of hand guard area of the barrel (and lateral pressure toward the hand guard cap), install the 3/8" long cone point set screw into the bayonet lug hole with a bit of Loctite 242 on the threads. Snug it and check your alignment. Now install the other set screw, also with Loctite into the other hole and snug it. Check your alignment again and then tighten both set screws alternately until you are comfortable with how tight they are. You'll have to be careful with the short one since there is very little thread engagement with this one but you can torque the long screw pretty firmly. (I would like to add that you can use the Loctite of your choice. 242 is "medium strength", easily dis-assembled, and is good to about 300 F. High temp, high strength Loctite might be a better choice for extreme duty or continued sustained firing. Formula 272 might be better a better choice since it is good to about 450 F)
You're done unless you have a used FSB, then move to step 14.
Step 14: Make sure your 10-32" by 1/8" set screws are degreased. Install all 4 (with Loctite!) until they bottom but do not tighten. Now start snugging them up by work from side to side, diagonally. Example: Tighten front left screw then rear right screw then rear left screw then front right screw.
DO NOT OVER-TIGHTEN THESE. These screws are only there to plug the holes and add a bit of stability but they could cant your FSB if you over-tighten them or do not tighten them equally.
Making this statement again: Drilling and pinning is the preferred method and has been done by manufacturers for decades because it is the best way to insure that the FSB will not move.
The second screw method is a garage mechanic hack- a way to attach your FSB without sending your barrel off and spending extra money. I am a recreational shooter so this method suits me fine. Would I take it into combat? No. But I would take it to the range, the coyote hunt, or use for home defense purposes, although I hope the latter never happens......
Hello! Great blog and very well documented. I found this while looking at options for a new fsb i'm installing. I think this is a great option for diy if you already have a fsb and the tooling. I just bought one of these: https://shop.deztacticalarms.com/A2-Fixed-Front-Sight-Clamp-on-750-w-Bayonet-Lug-DEZ-1035-GB.htm
ReplyDeleteI found this while looking for an alternative (and cheap)way to install a FSB myself. My barrel already has one dimple, so that should hopefully help to align the sight. Great info! Thanks!
ReplyDeleteI've used this method on a couple FSB's over the last year. Great detailed instructions and pictures!
ReplyDelete